ENTROPIA MINER
A statistics tool for mining in Entropia Universe.
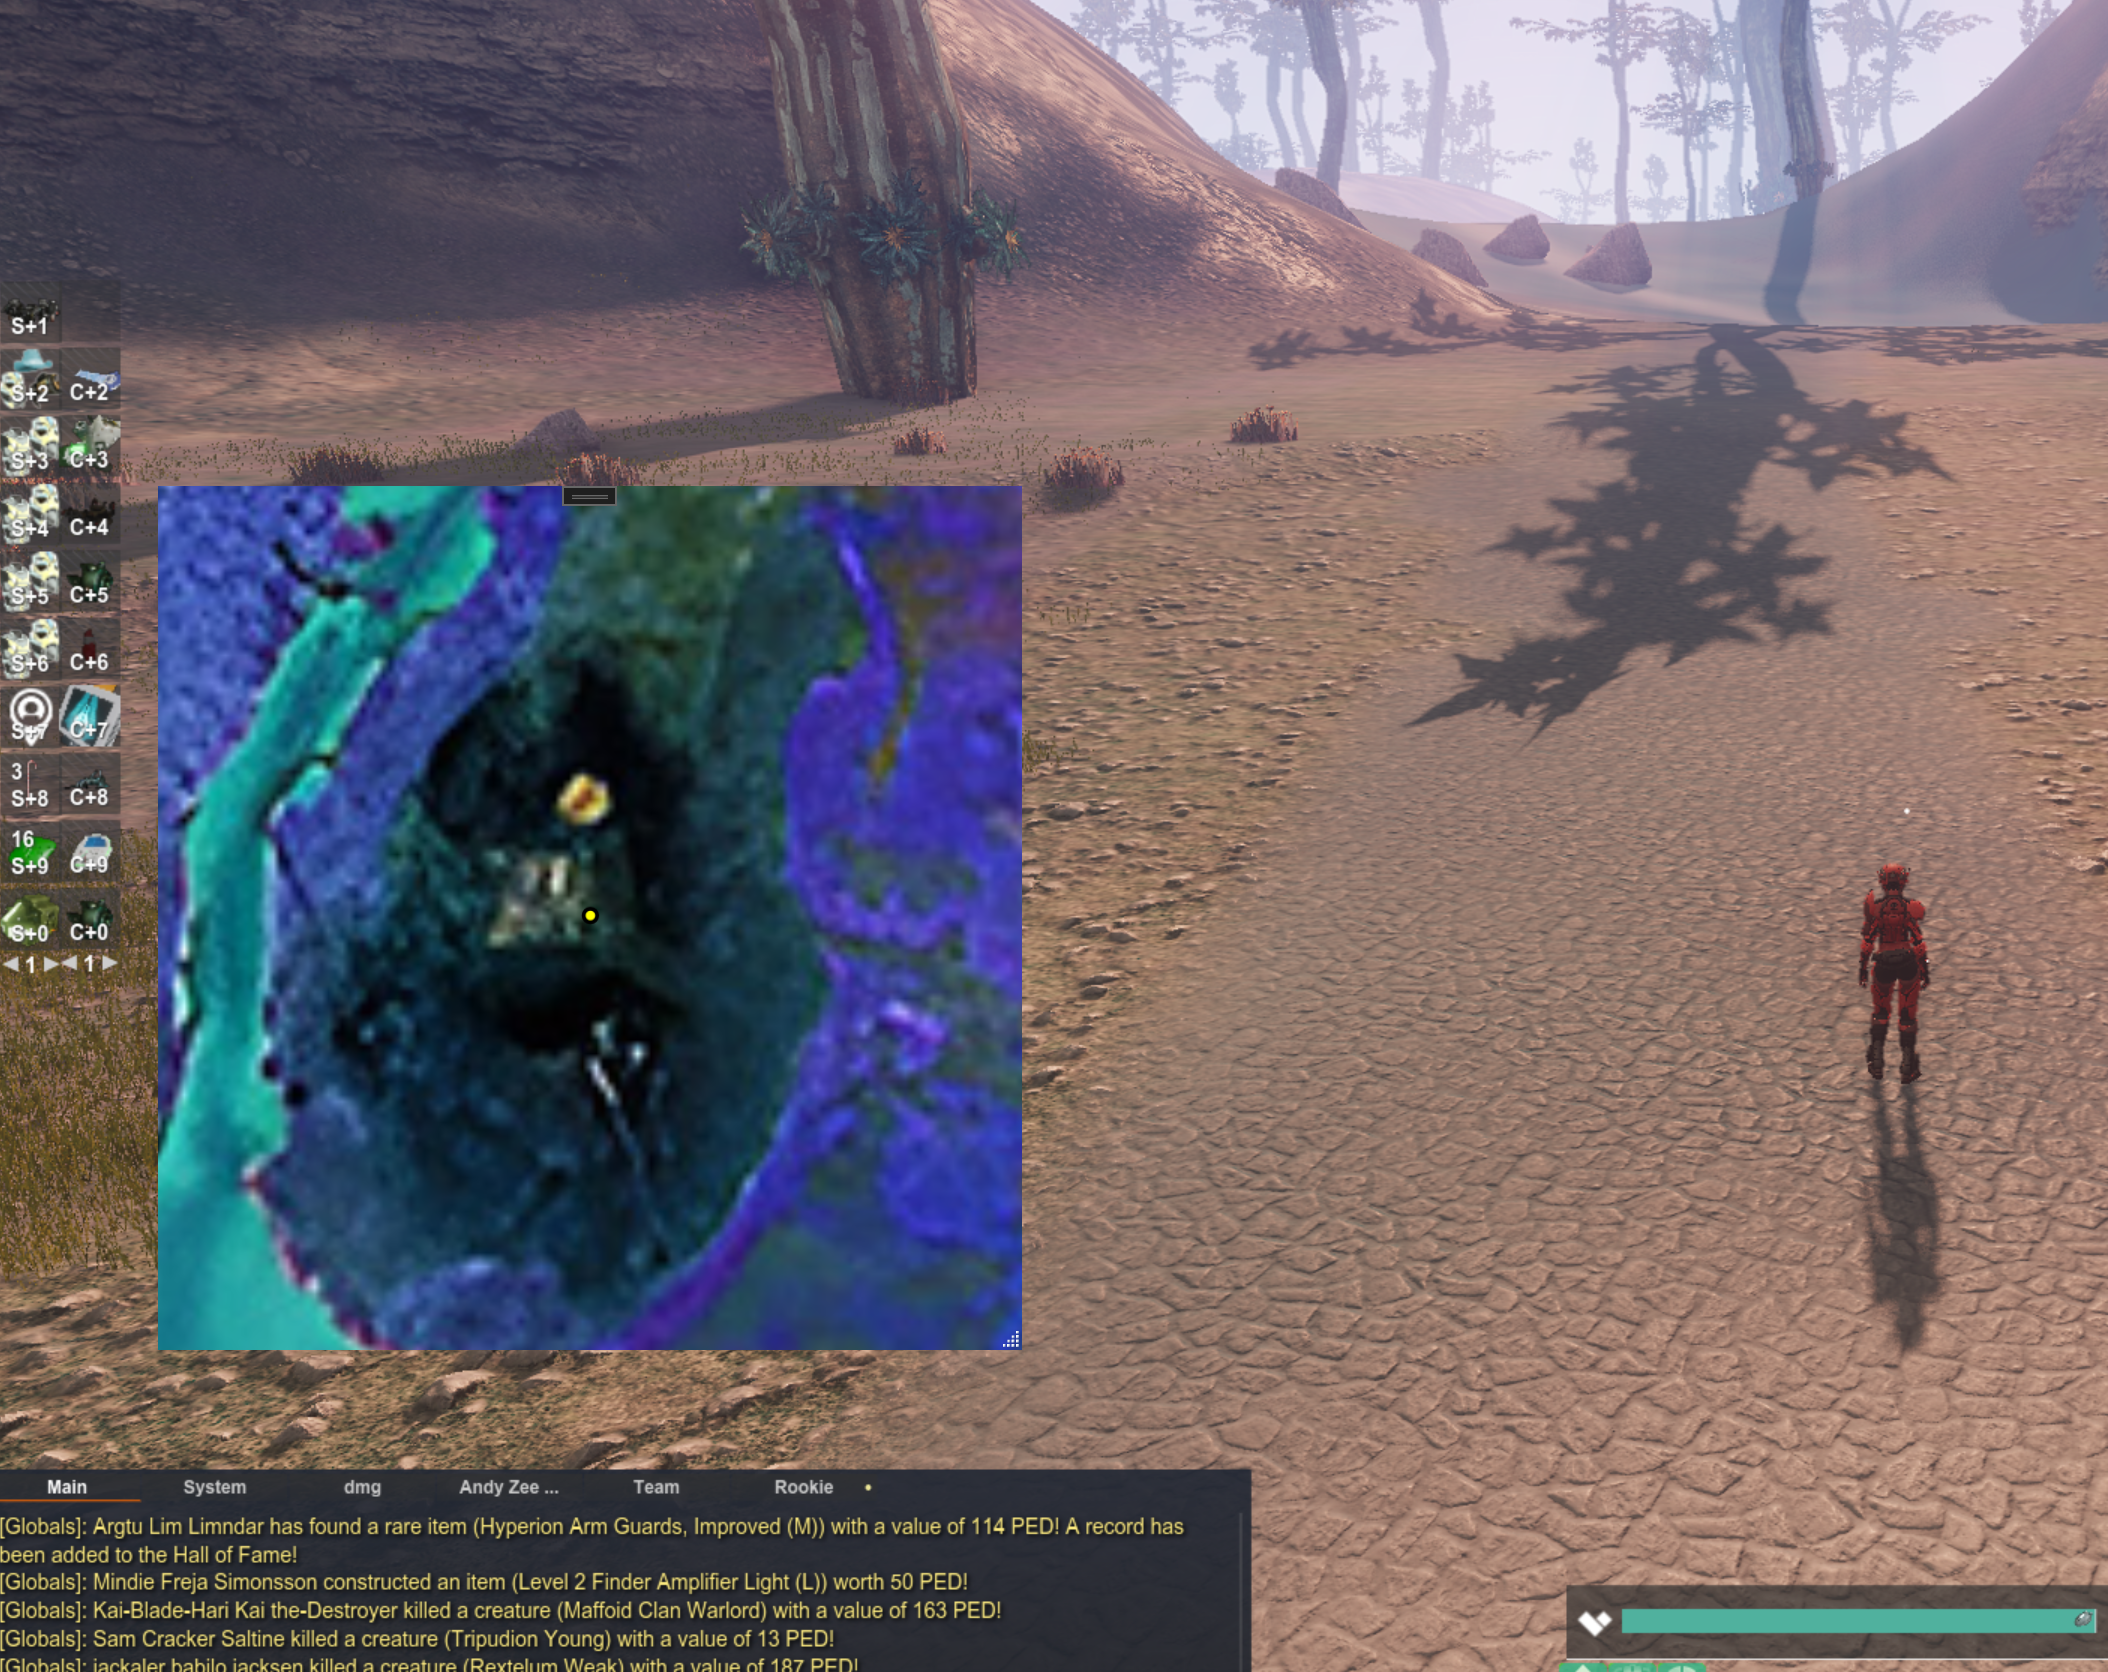
THE MAP
1) All maps are AI enhanced, up to 80x zoom - seamlesly move and zoom on any map in Entropia Universe.
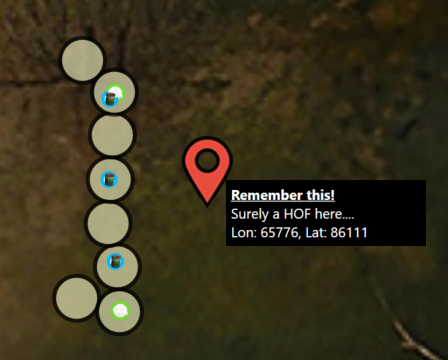
2) Place custom markers on map, right click on map and select marker.
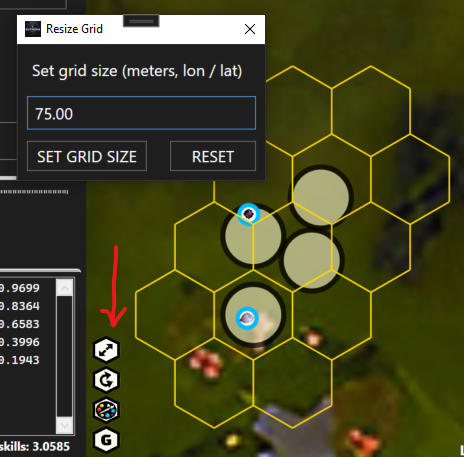
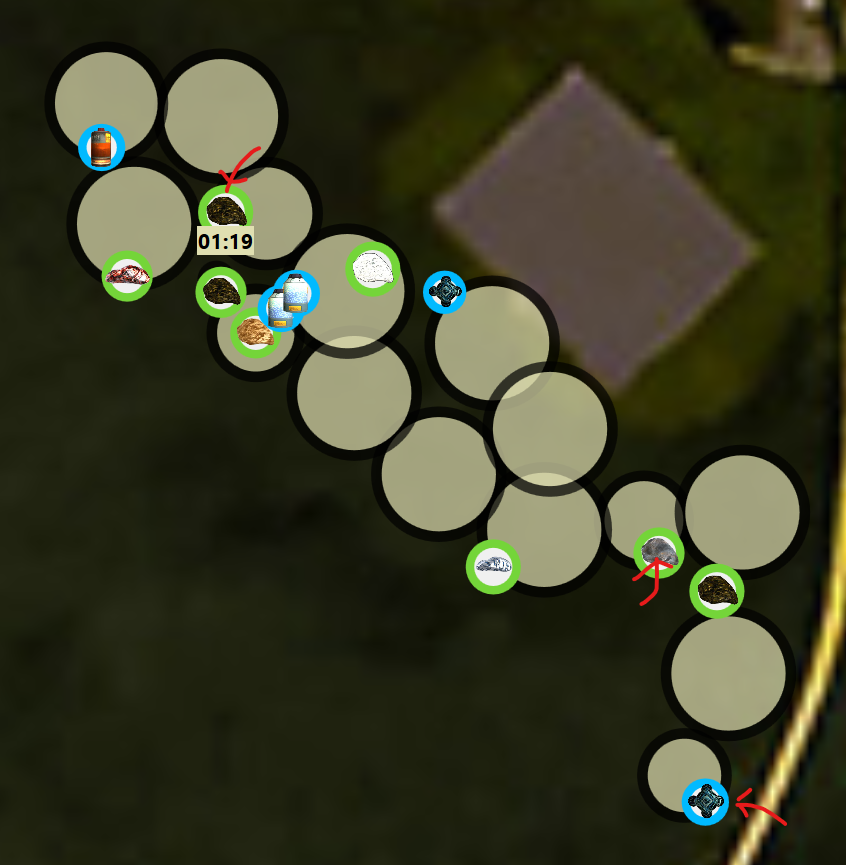
3) Mining grid, with auto detection (as you can see, I did not use the mining grid, not getting totalt coverage).
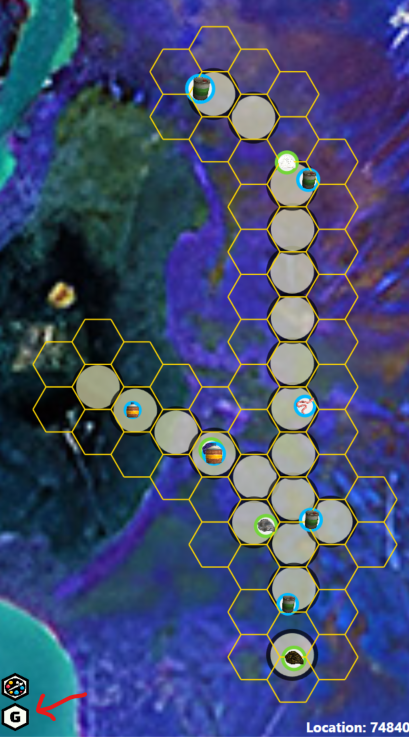
You can rotate the grid, so it's going horizontal or vertical.
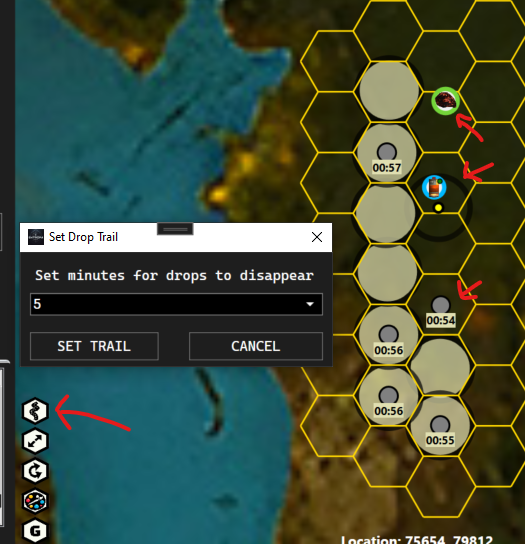
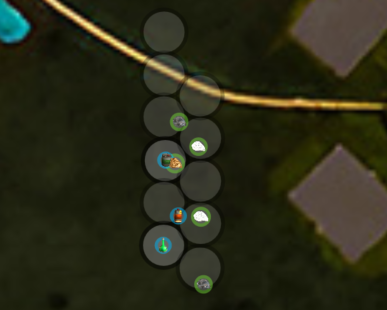
You can set a trailing on the drops, so they will disappear after x minutes. See the image here, where the drops are removed after 5 minutes.
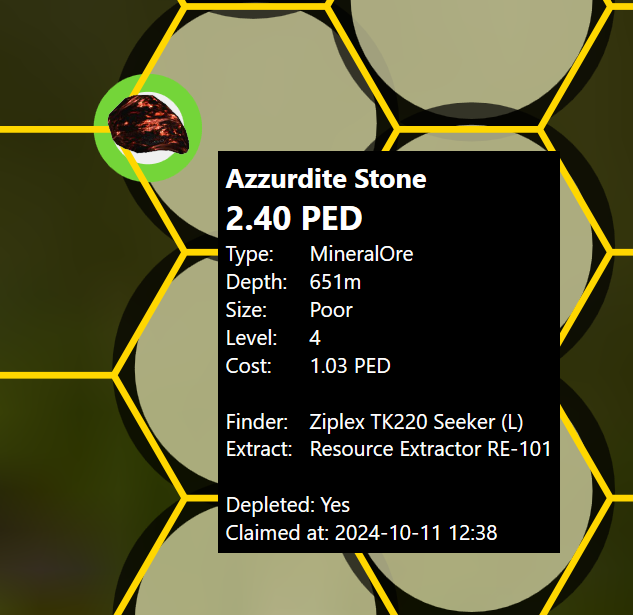
4) Popups on all claims with details.
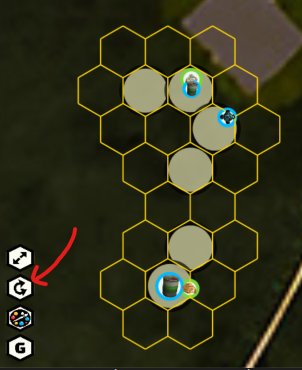
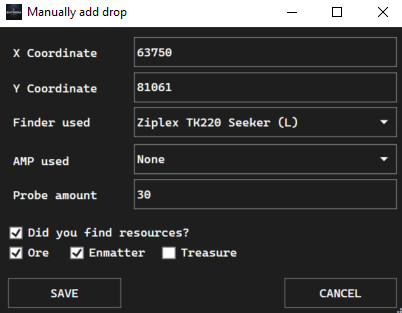
5) If the tool missed a drop, you can manually add drops, right click the map and you will see this menu:
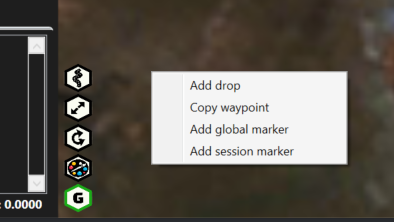
Click "Add drop" and you will see this menu, enter the details and click "SAVE":
6) Copy waypoints, right click the map and select "Copy waypoint", this will copy the waypoint to clipboard as "/wp [Calypso, 74312, 73159, 205, Waypoint]" etc.
SETTINGS

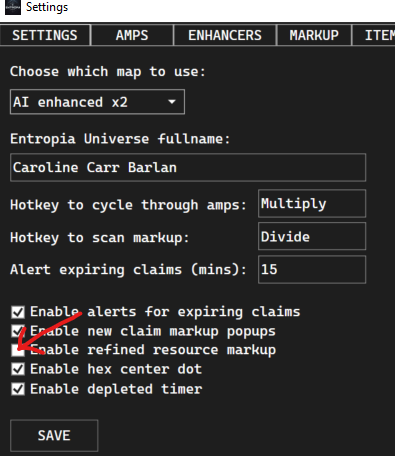
1) Enable alerts for expiring claims, this will alert you when a claim is about to expire. Enter the amount of minutes in the "alert expiring claims (mins)" textbox.
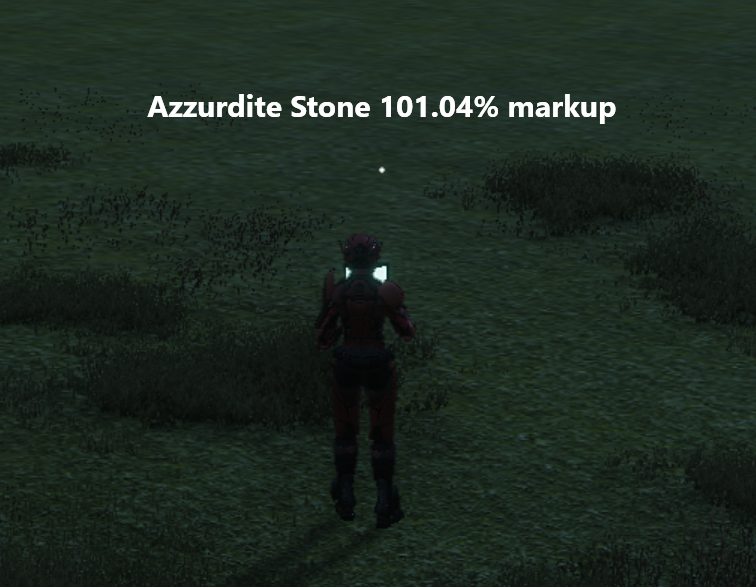
2) Enable new claim markup popups, this will popup a message when you get a new claim, showing the markup of the resource as an overlay.
3) Enable refined resource markup, this will use the refined resource markup instead of the unrefined markup. See MARKUP for more information.
4) Enable hex center dot, this will show a dot in the center of the hex you are mining, so it's easier to find the center of the hexagons.
5) Enable depleted timer, this will show a timer on the deed, showing how long time it will take before the deed is depleted.
6) Enable dynamic drop size, this will resize the drop circles based on the position of the deeds.
7) Enable save windows position, this will save the position of the main tool window and overlays, so when you open the miner again, it will remember the position of the windows.
You can click the "RESET WINDOW POSITIONS" button to reset the window positions to their default values.
If you end up with windows out of view, you can also start the application with "EntropiaMiner.exe --center-application", this will center the application on the screen when it starts up again.
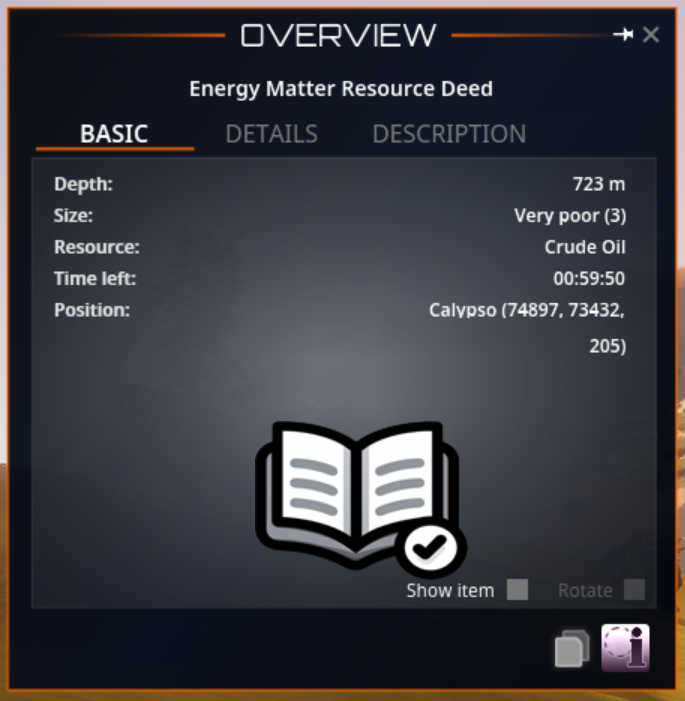
READING DEED DETAILS
To get more details about the claims, which depth they were at specifically, view the deed information and it will automatically read it, and display a little icon that it has been read.
It's important that the deed icon inside the deed overview is hidden! Click the "Show item" to disable icons.
SHORTEST PATH
1) Click the "START SHORTEST PATH" button to view the shortest path to all claims on the map.
This will track and follow you and update as you move.
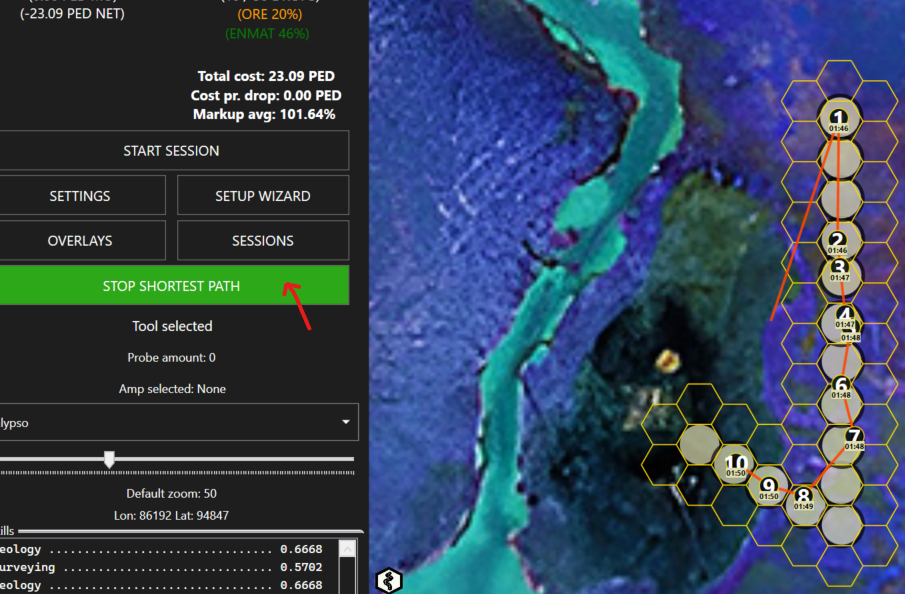
Click again to stop generating the path.
SESSIONS
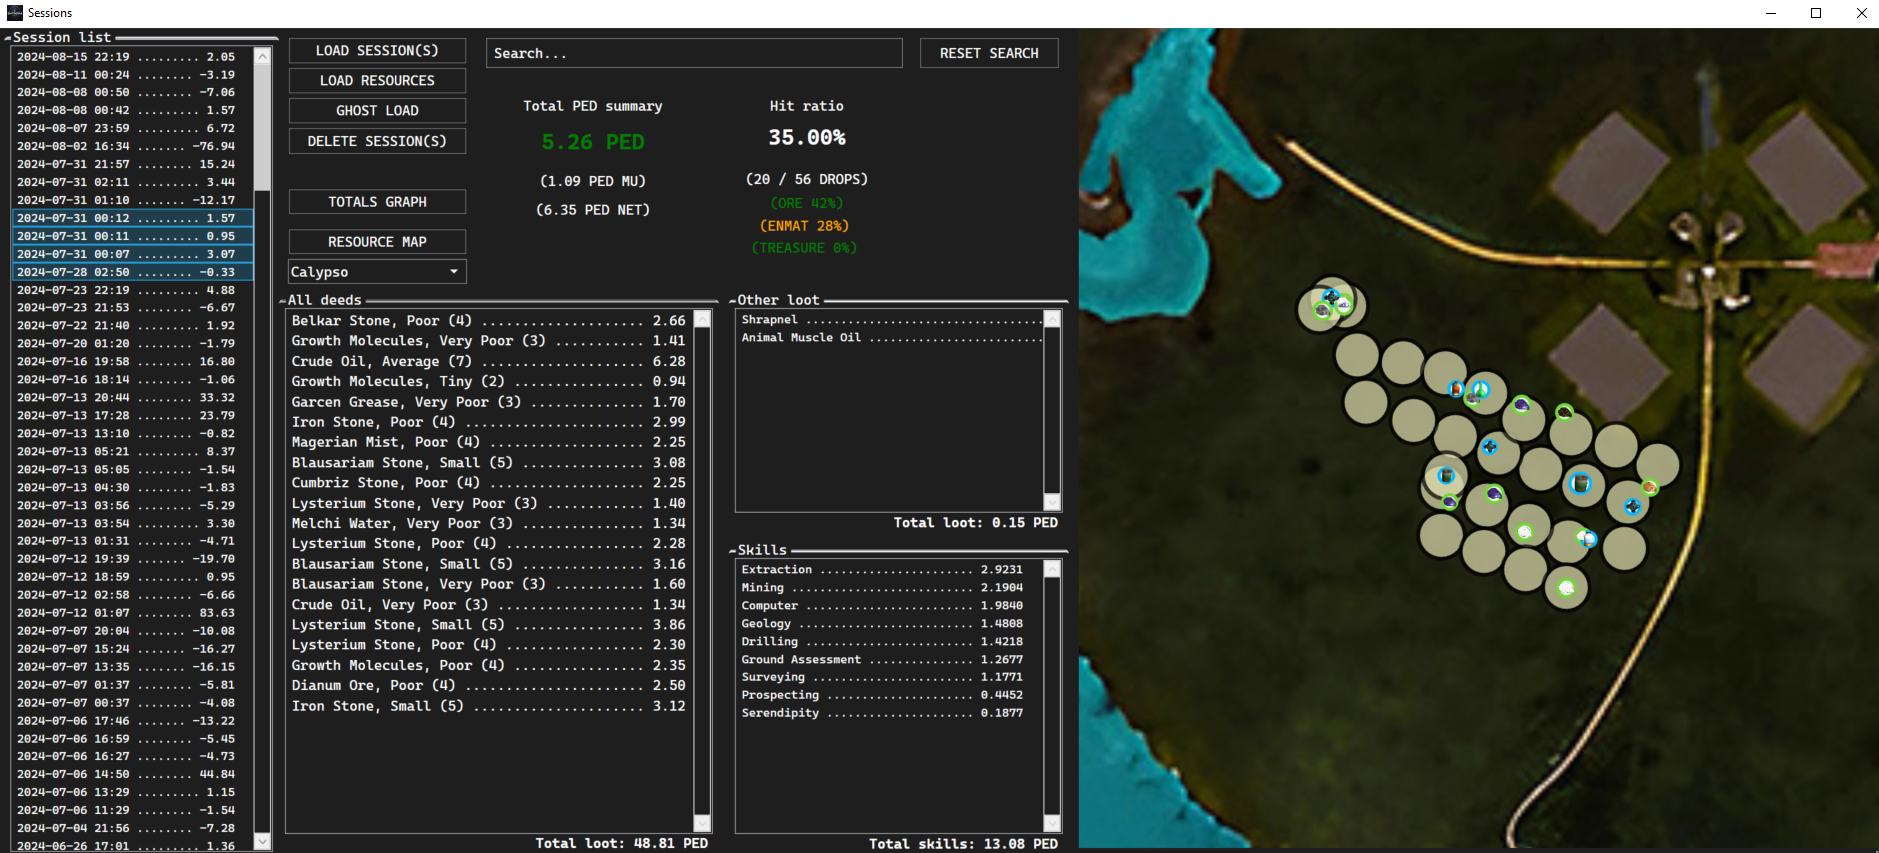
1) Viewing, loading and ghost loading sessions.
2) You can select multiple mining runs and view them all combined, load them combined as if was one run.
3) You can ghost load a session, this will add all the drops and claims to the map in a more dark transparent way, but the statistics will not be loaded.
4) Loading resources, you can load all resources from a session, so only the resouce will be shown and not the drops.
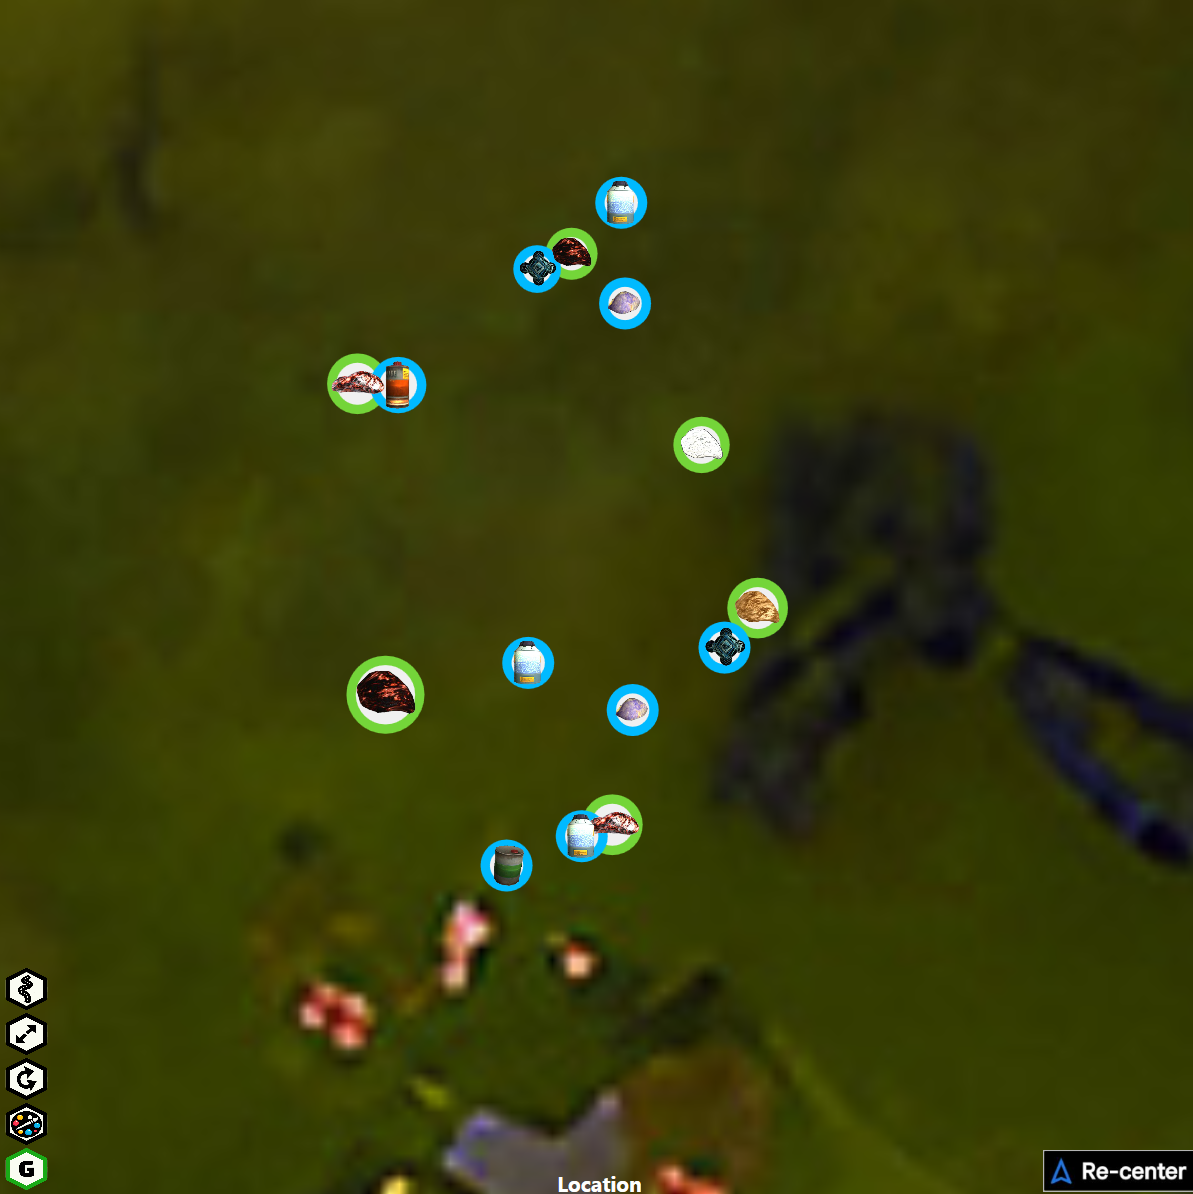
5) Resource map, select the map and click "Resource map" to view ALL deeds as resource on the map.
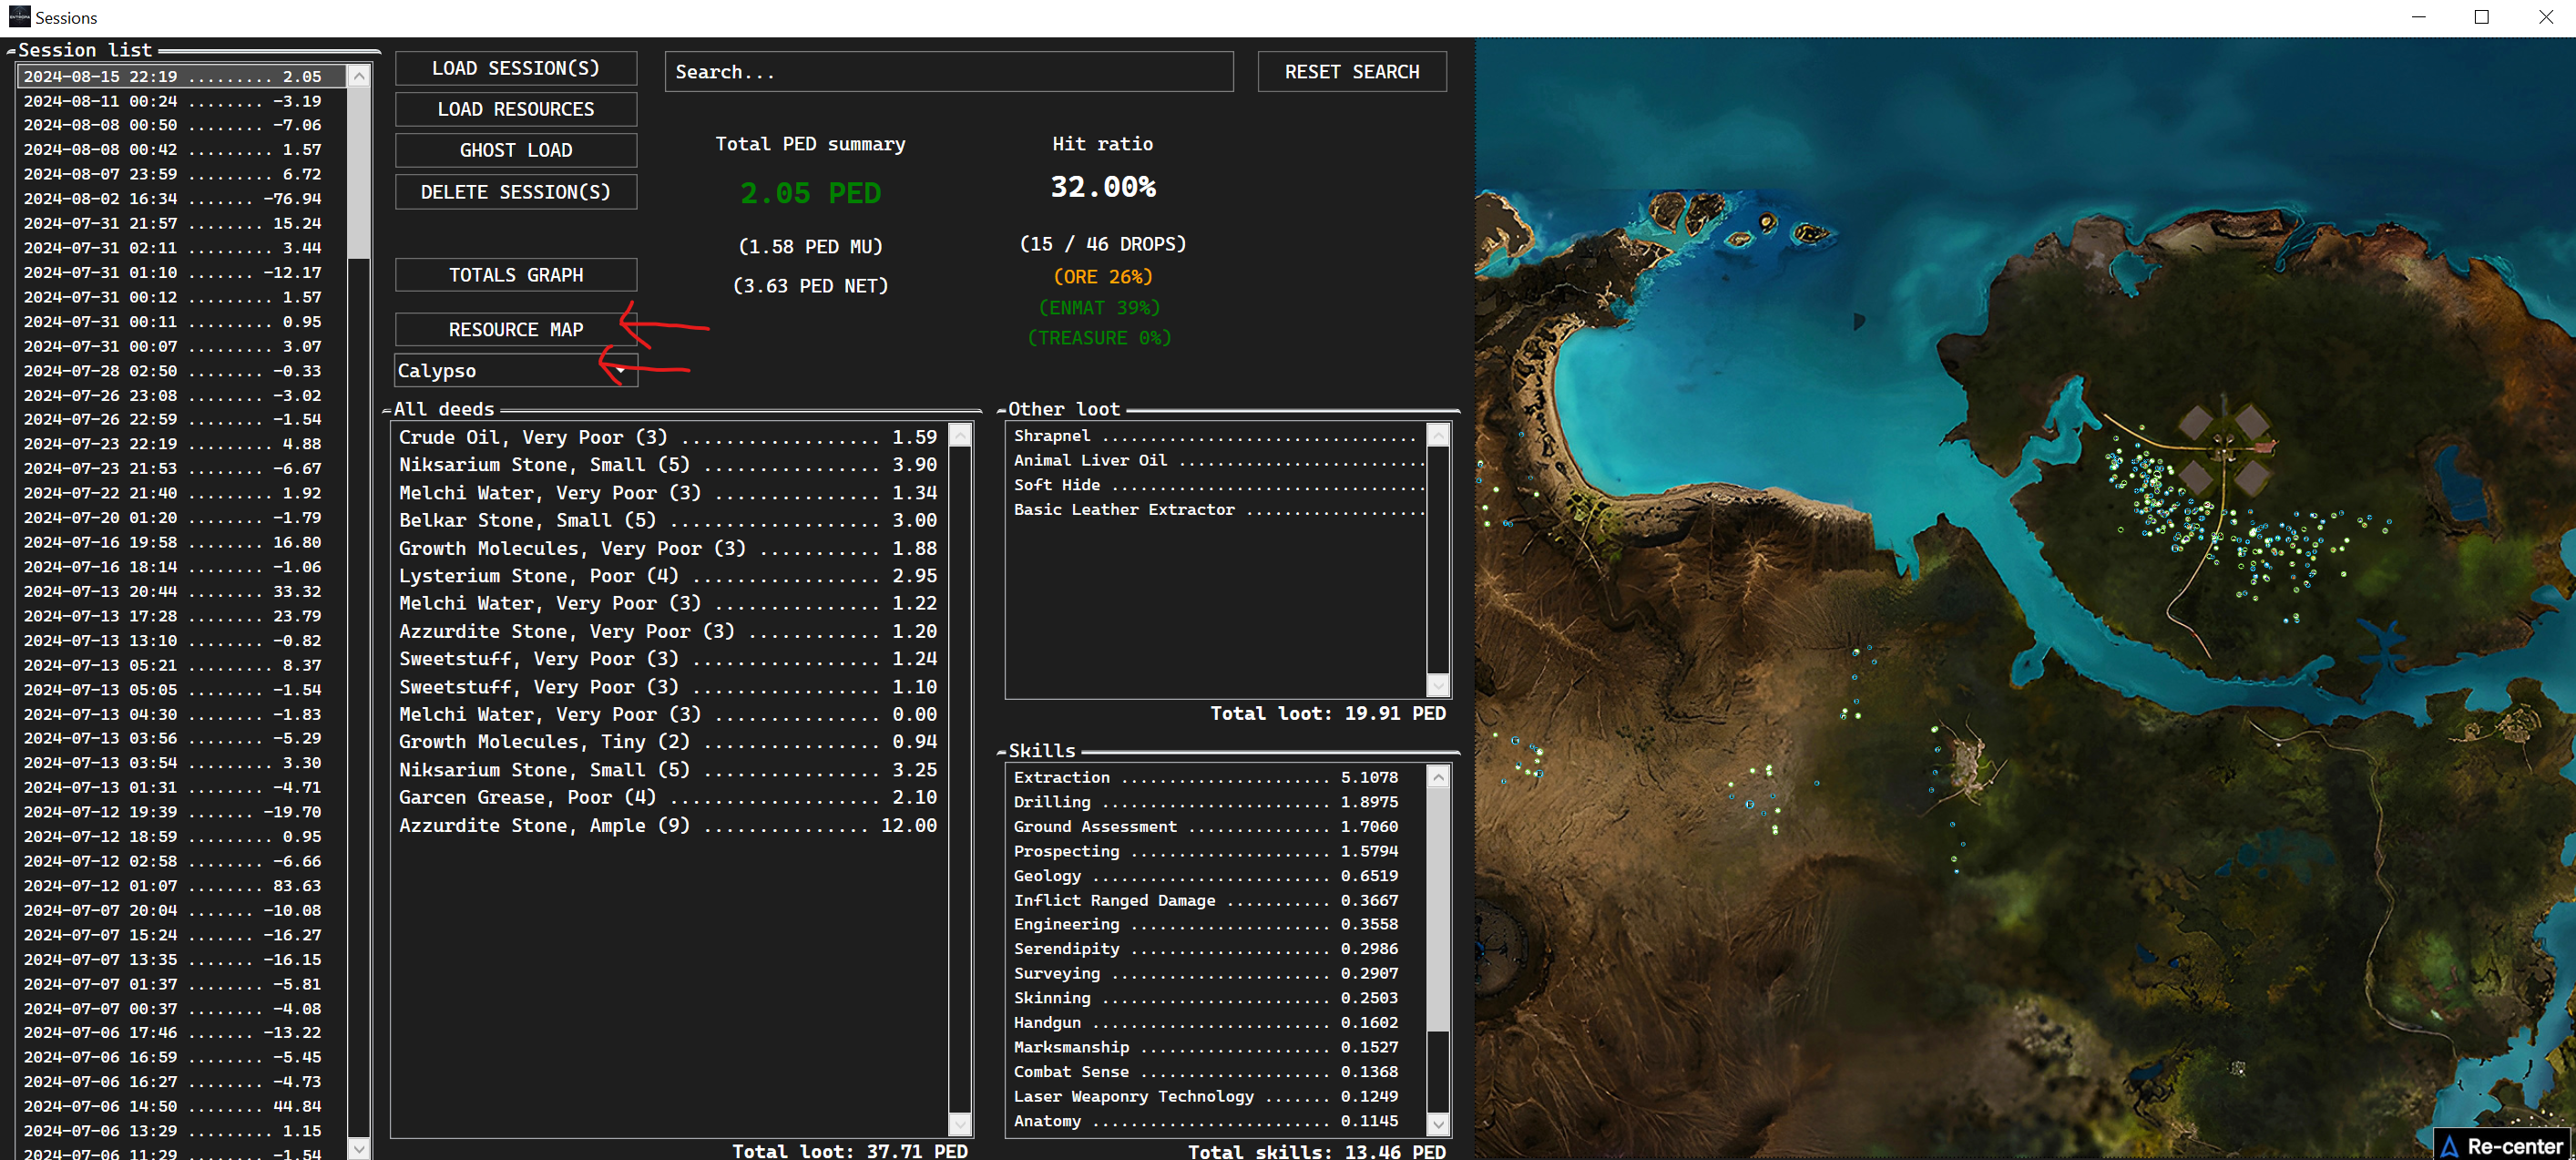
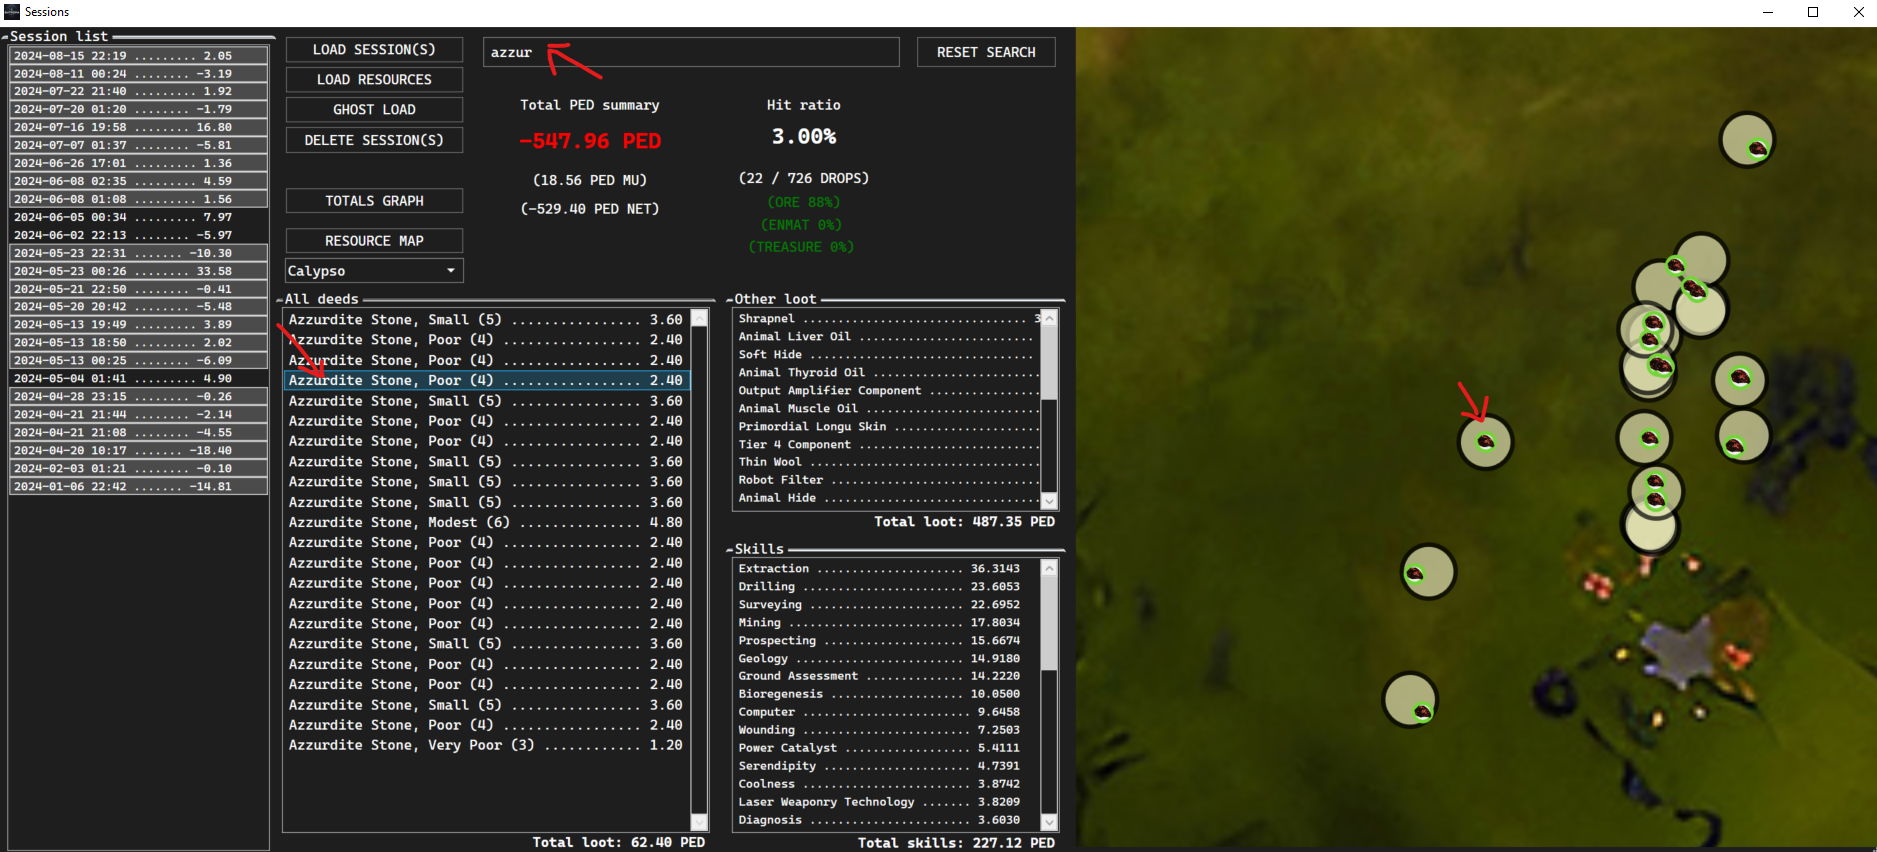
6) You can use the search function to search for a specific resource or size of claim.
First enter any resource name, like "belkar" or "melchi", or size "large", "ample". After this you can click in the deed list on any of the claims to view it on the map.
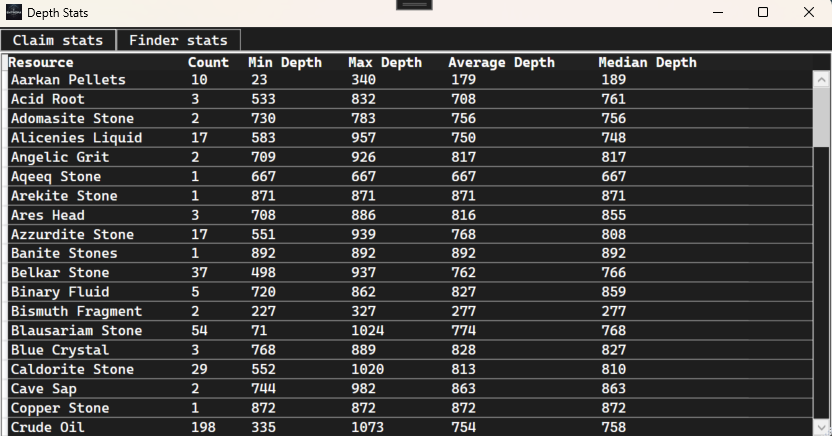
7) Depth stats, click the "DEPTH STATS" button to view the depth stats of the loaded sessions.

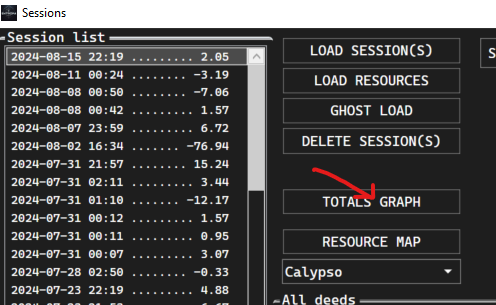
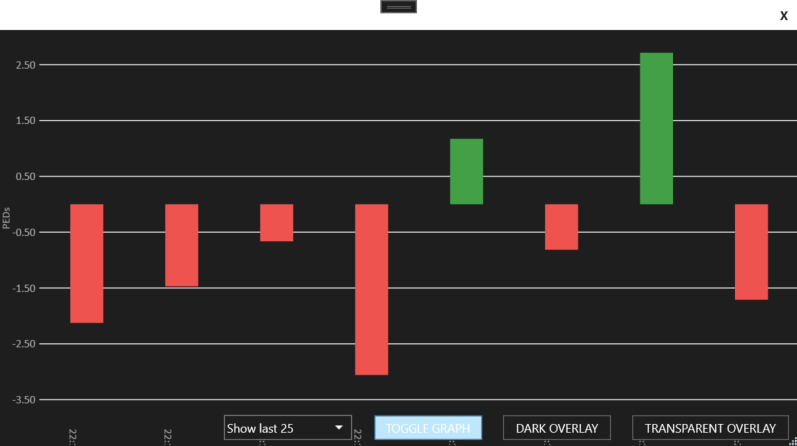
8) The total graph will show the total winnings / cost from all sessions in a graph.
9) If you toggle the graph, it will show the total winnings in green and total loss in red.
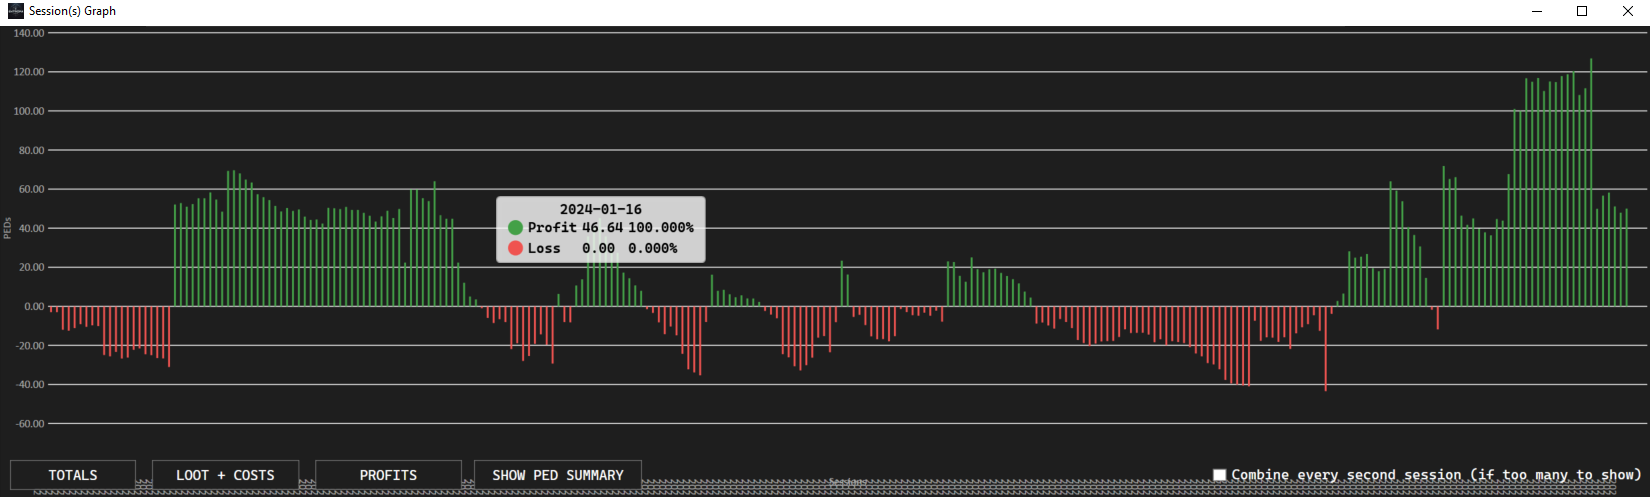
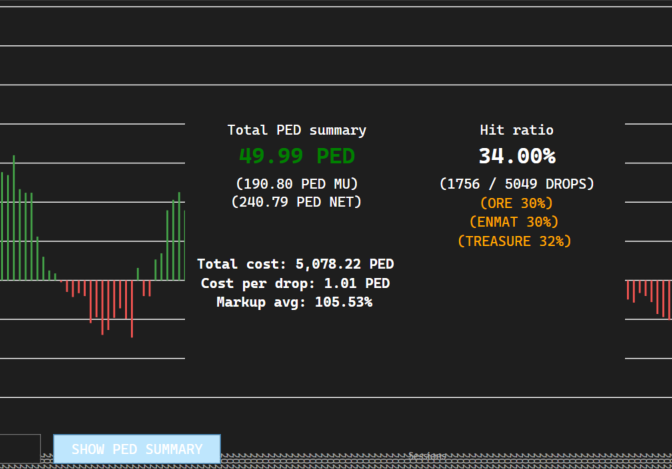
10) Click the "show ped summary" button to view the totals.
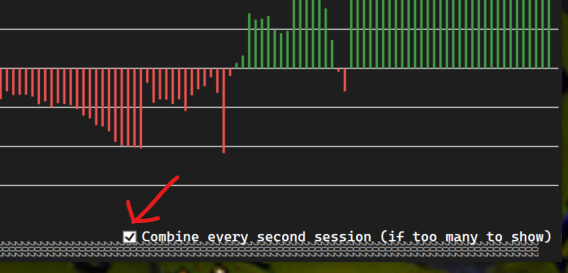
11) Tick the "combine every second session (if too many to show)" checkbox, if you have too many sessions to show, it will combine every second session.
FINDER SELECTION
The finder selection is fully automatic, it will fingure out which tool you are using and select it for you. We have added all tools available in Entropia Universe, so it knows the range and depth.
It will automatically scan to know how many probes you will use.
AMP SELECTION
1) In the "SETTINGS" click "AMPS", here you can add your amps and TT value.
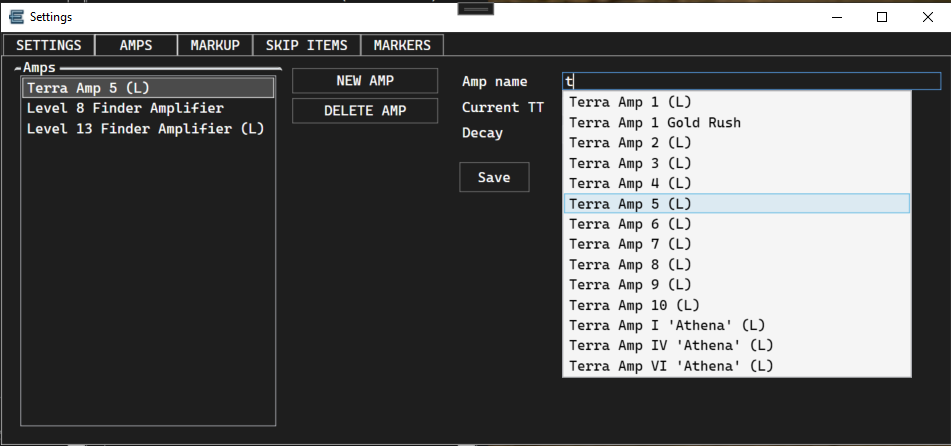
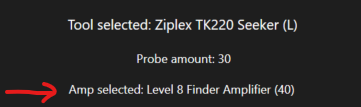
The amp selection is enabled by pressing "*" (asterix), it will circle through the amps you have added.
When the amp is used up, it is deleted.
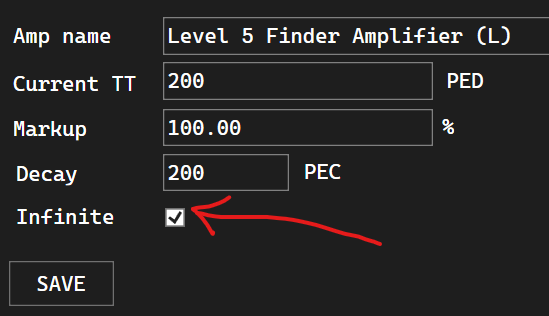
You can mark the amp to be "infinite", this means it will not be deleted when it's used up. It will go back to its original TT value.
SPLIT SESSIONS
1) Start a session by pressing "START SESSION".
This will start the current session, you can click "STOP SESSION" anytime to pause the session or to start a new session.
2) To split a session means to start a new session, but keep the absolute totals of all split sessions.
When a session is running, you can split a session by clicking the "SPLIT SESSION" button.
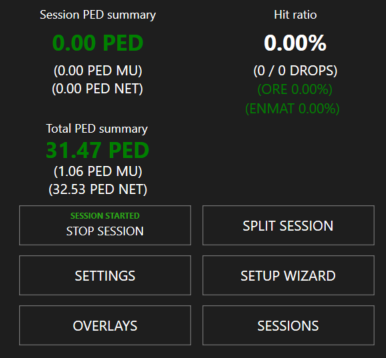
This will bring up the "Total PED summary" as the absolute total, and in top "Session PED summary" which is the total of the current session.
It will also ghost load the previous session and put a grid on it.
3) Combine session will combine all split sessions into one session.
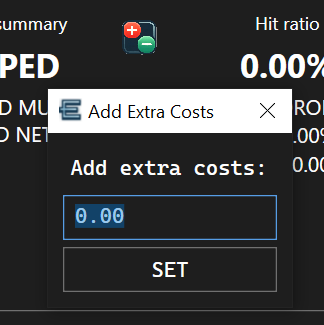
ADDING EXTRA COSTS
You can add extra costs to the session, like decay, repairs, etc. Just click the icon.

Enter your costs and click "SET", you can enter positive and negatiive numbers, when you enter a positive number, you will add costs - your totals will decrease.
RANGE ENHANCER SELECTION
1) In the "SETTINGS" click "ENHANCERS", here you can add your range enhancers.
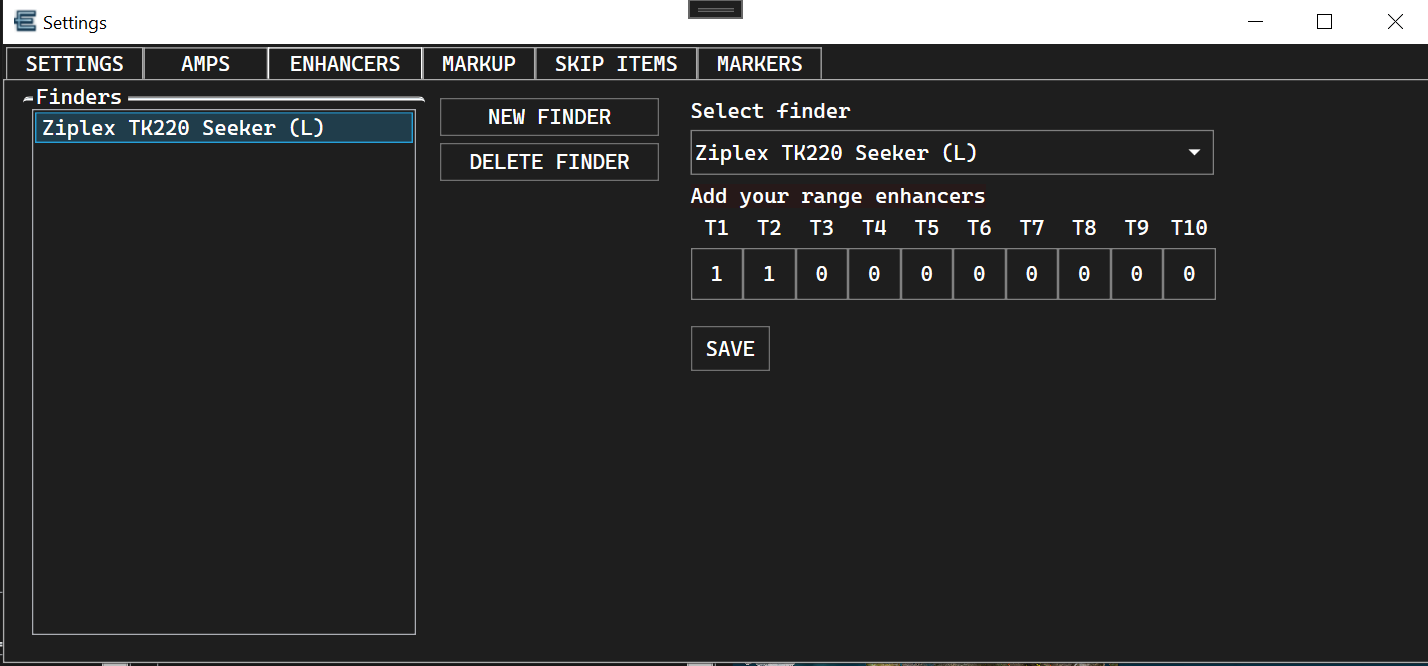
This will show the correct range for your finder on the map.
STATS
1) Tracking total winnings / loss.
2) Tracking hit ratio.
These stats will not include anything other than mining resources.

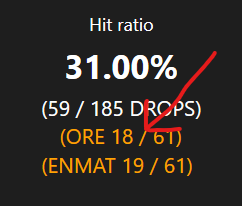
3) You can click the (ORE X %), or (ENMATTER X %) to view the stats as percentage or full numbers.
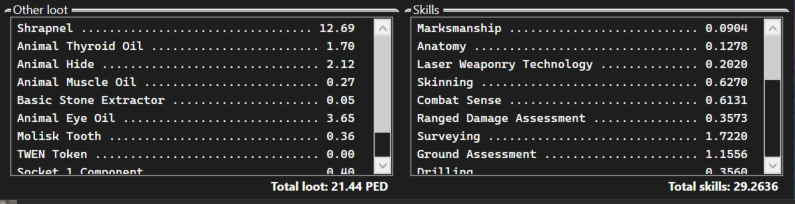
4) Tracking skills.
5) Tracking other loot than mining resources.
If you double click any "other loot", it will take you straight to the skip items setup.
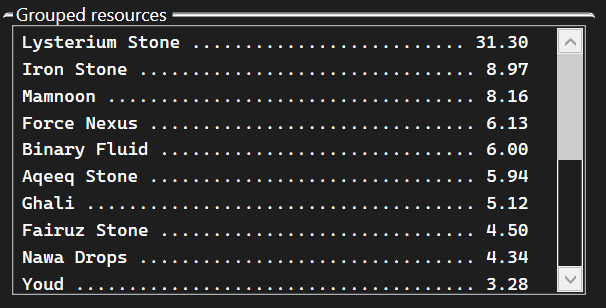
6) Grouped resources, this list is sorted grouped resources from the "all deeds" list.
If you double click the grouped resources, and it will copy the grouped resource list to clipboard.
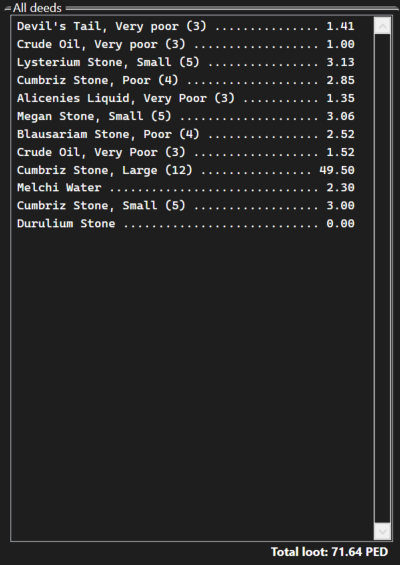
7) All deeds.
If you double click any deed, it will take you straight to the markup calculator.
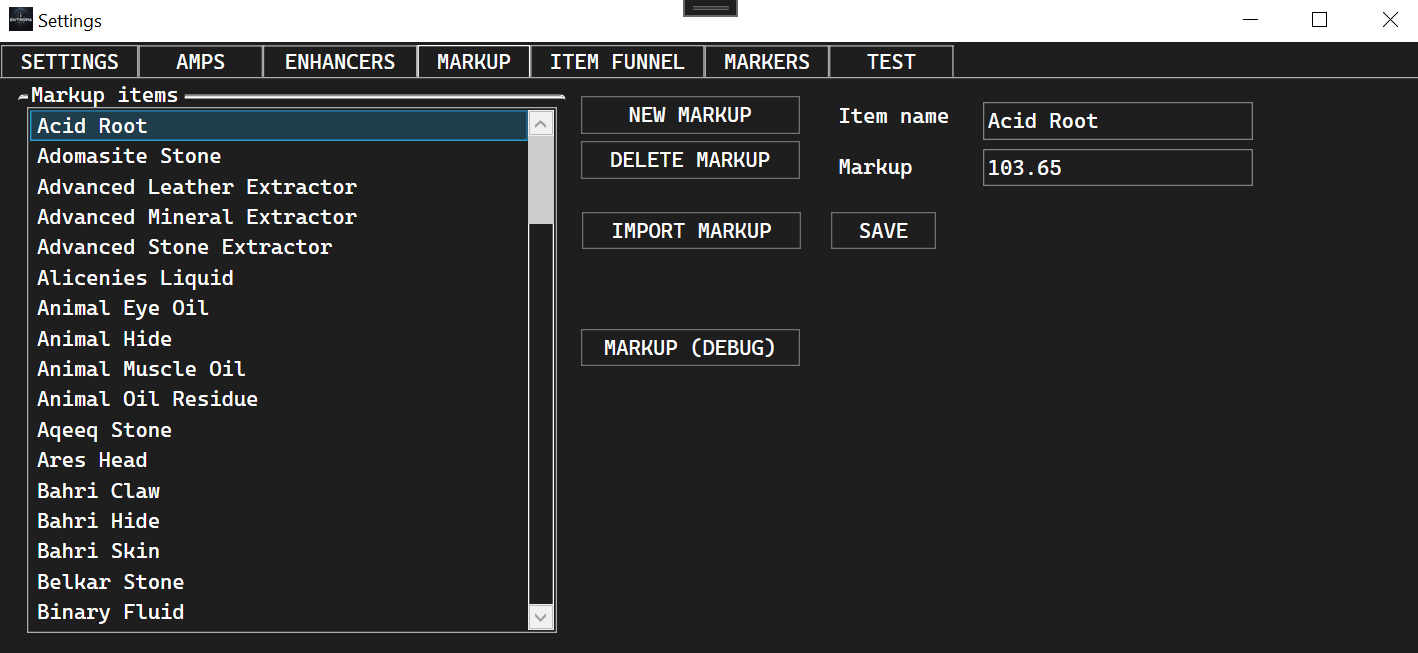
MARKUP
1) Here you can manually add all your markup.
2) Scan markup easily.
Press the hotkey "/" (forward slash) to scan the markup of the resource, then this message will show:
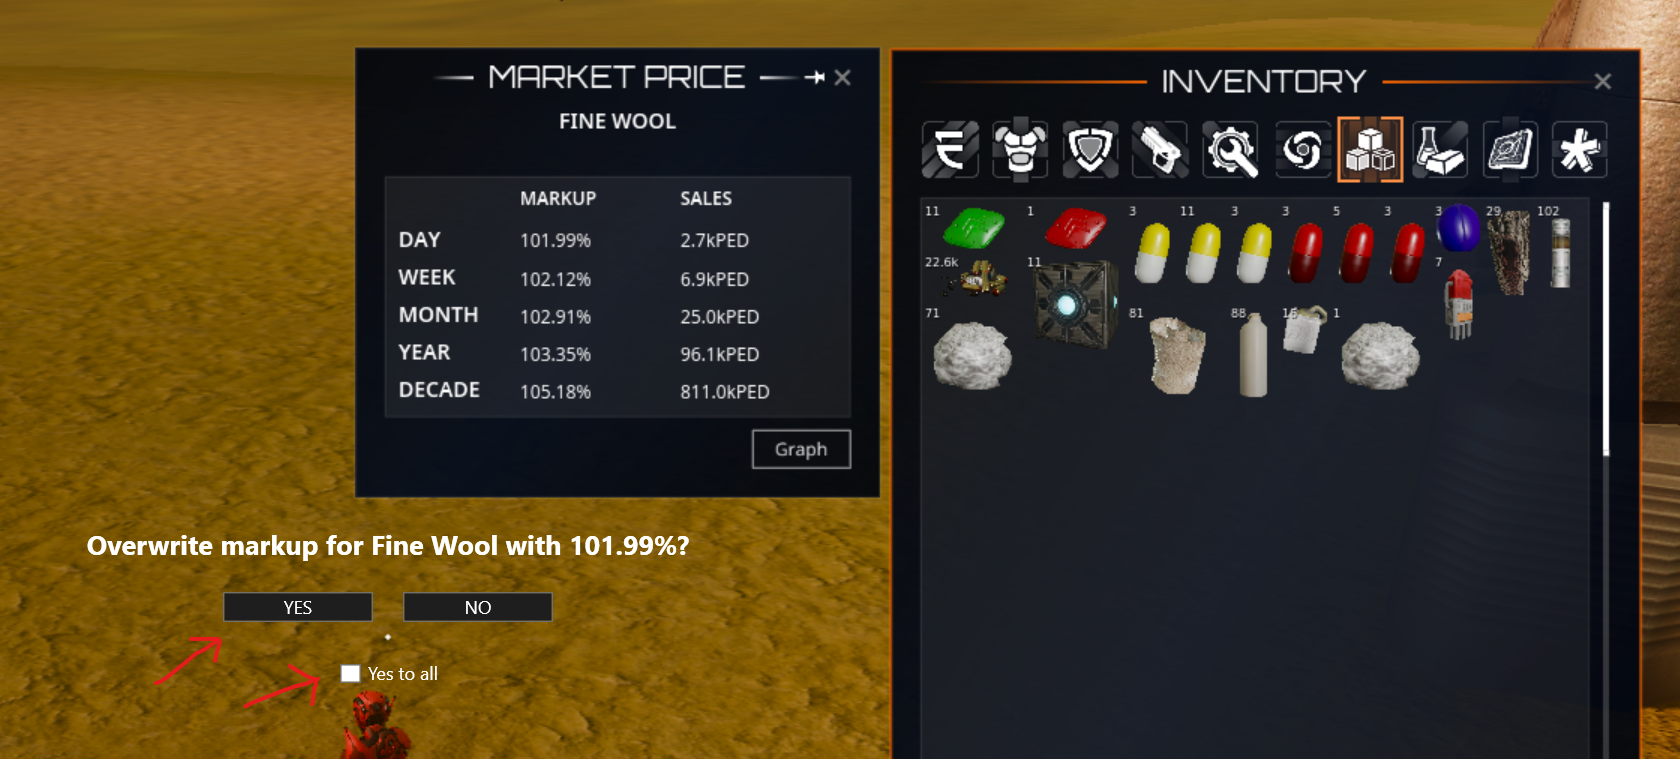
Click either "YES" or "NO" to add the markup to the resource, if you want to automatically apply the markup, check the checkbox "Yes to all".
Each time you scan the markup, it will popup with this message:

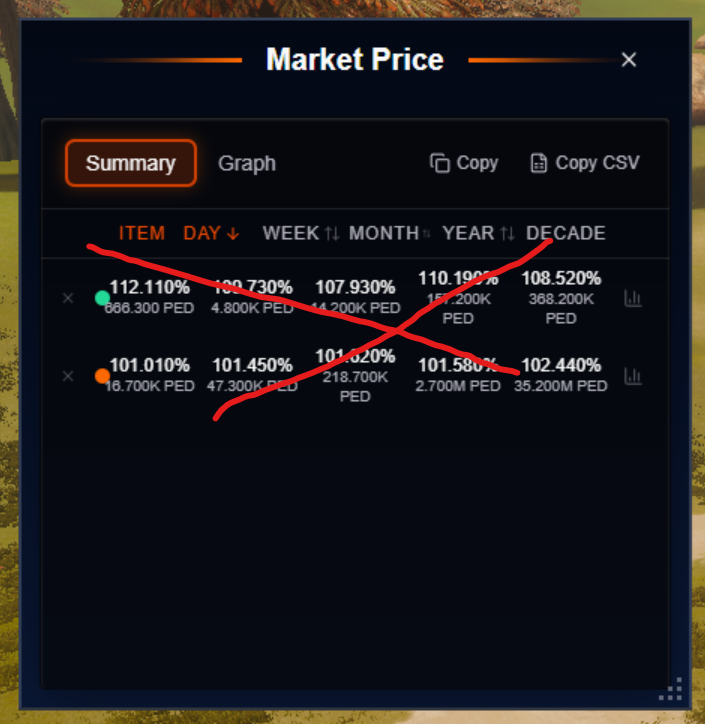
If your market price window looks like this next image, using multiple prices, then you HAVE to remove all but one, it will not scan multiple.
3) Using refined resource feature:
If you enable the "Enable refined resource markup" in the settings, when you mine, it will automatically use the refined resource markup - instead of the unrefined markup.
This means if you extract Belkar Stone, it will use the markup of Belkar Ingot instead. You can still scan both the unrefined and refined markup, it will prioritize the refined markup.
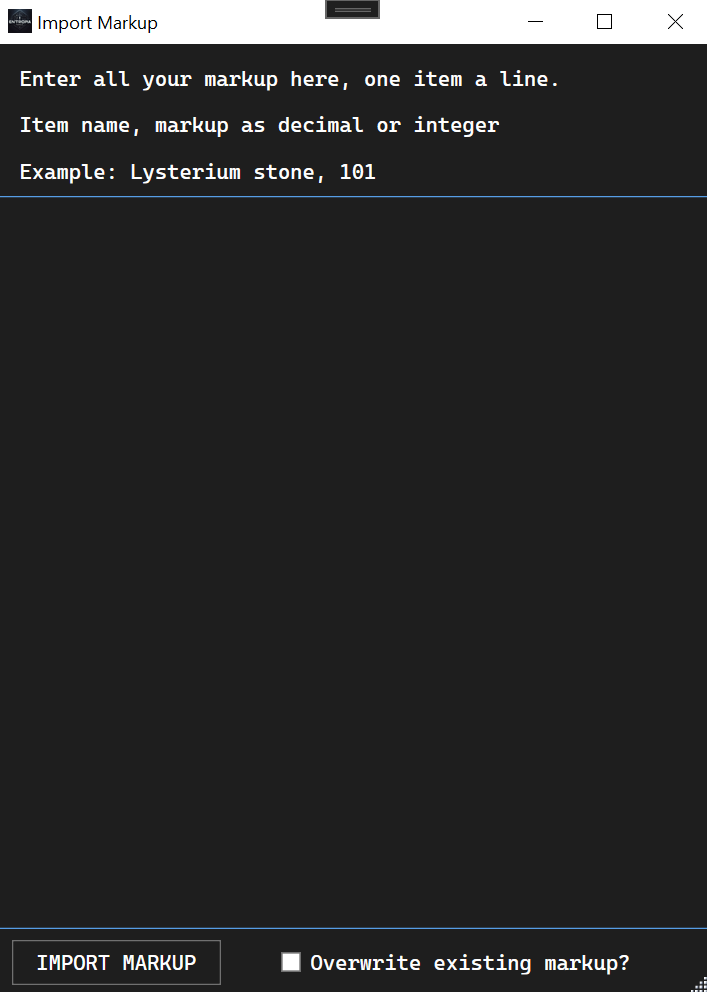
4) You can click the "import markup" button to import all markup easy:
Tick the checkbox "Overwrite existing markup" to overwrite all existing markup.
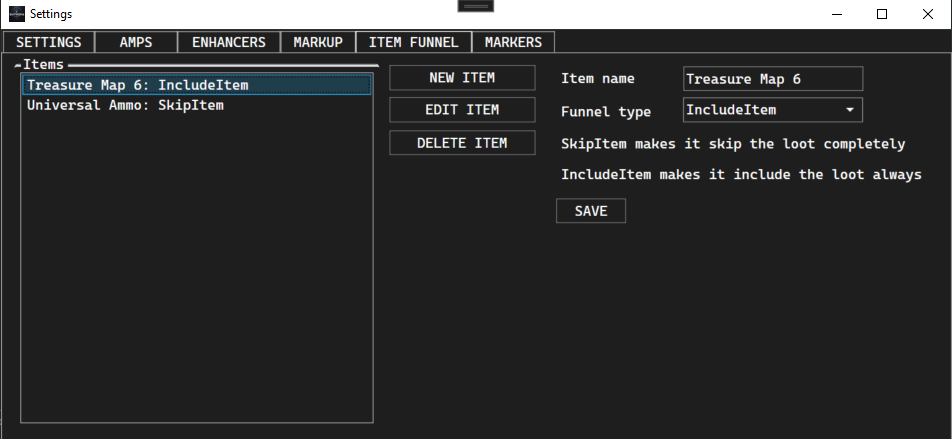
SKIP OR INCLUDE LOOT
1) Skip loot you don't want to track.
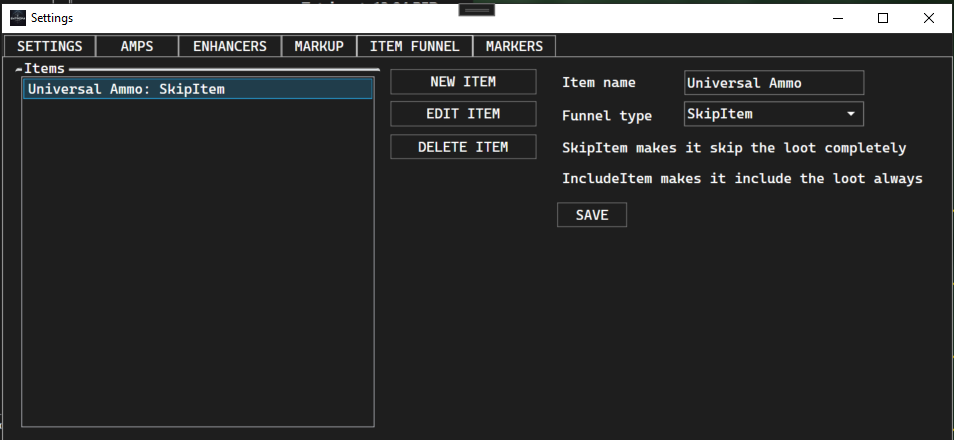
2) Include loot you want to track.
OVERLAYS
To activate the overlay, simply click the "OVERLAYS" button. This will show a mini menu with things to have as an overlay.
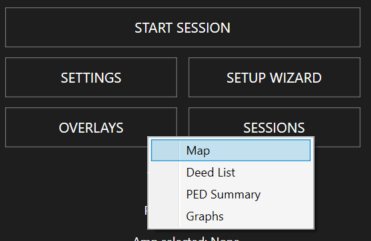
Here you can chose from map, deed list, PED summary or graph.
The overlays will show the map, deed list, PED summary or graphs on top of other applications, so you can have everything you need on one screen etc.
The graph will show the deed costs in red or winnings in green.
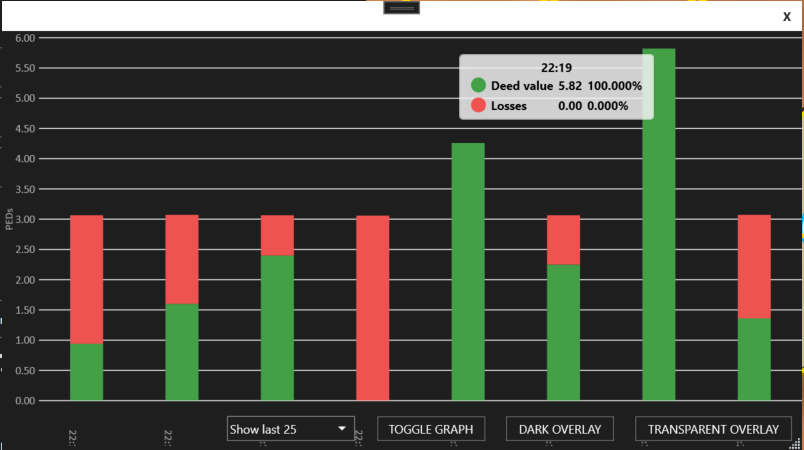
If you click the "TOGGLE GRAPH" button, it will show the true profits / loss on graph - like this:
SCREENSHOTS
Automatic screenshots of all globals or higher, these are saved in the "Screenshots" folder.
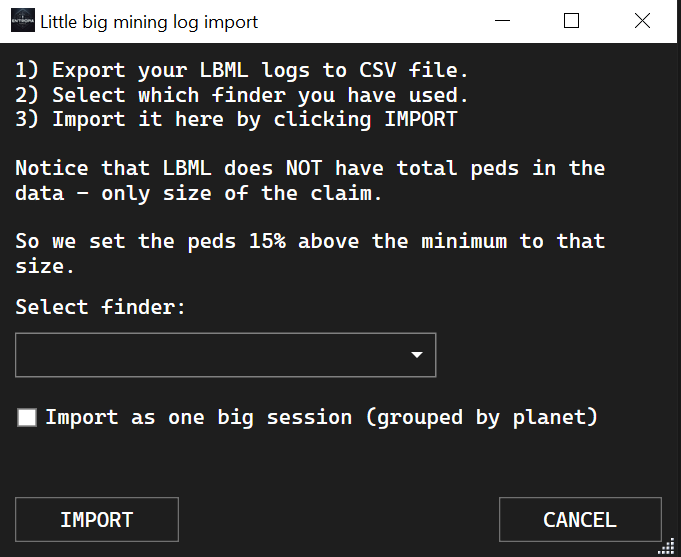
LITTLE BIG MINING LOG IMPORT
If you are using LBML, you can import all your data to the miner.
Click "SESSIONS" -> "IMPORT LBML".
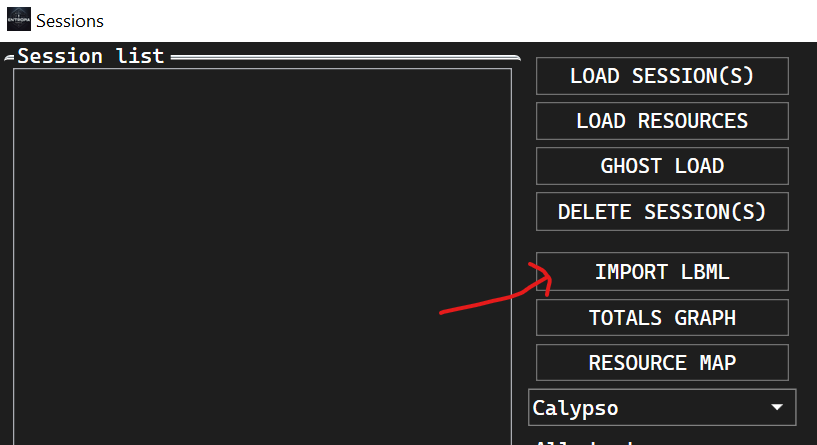
Select your finder and click "IMPORT", this will show a file dialog, select your LBML csv file and import all your data to the miner.